Contents of your senseBox:home
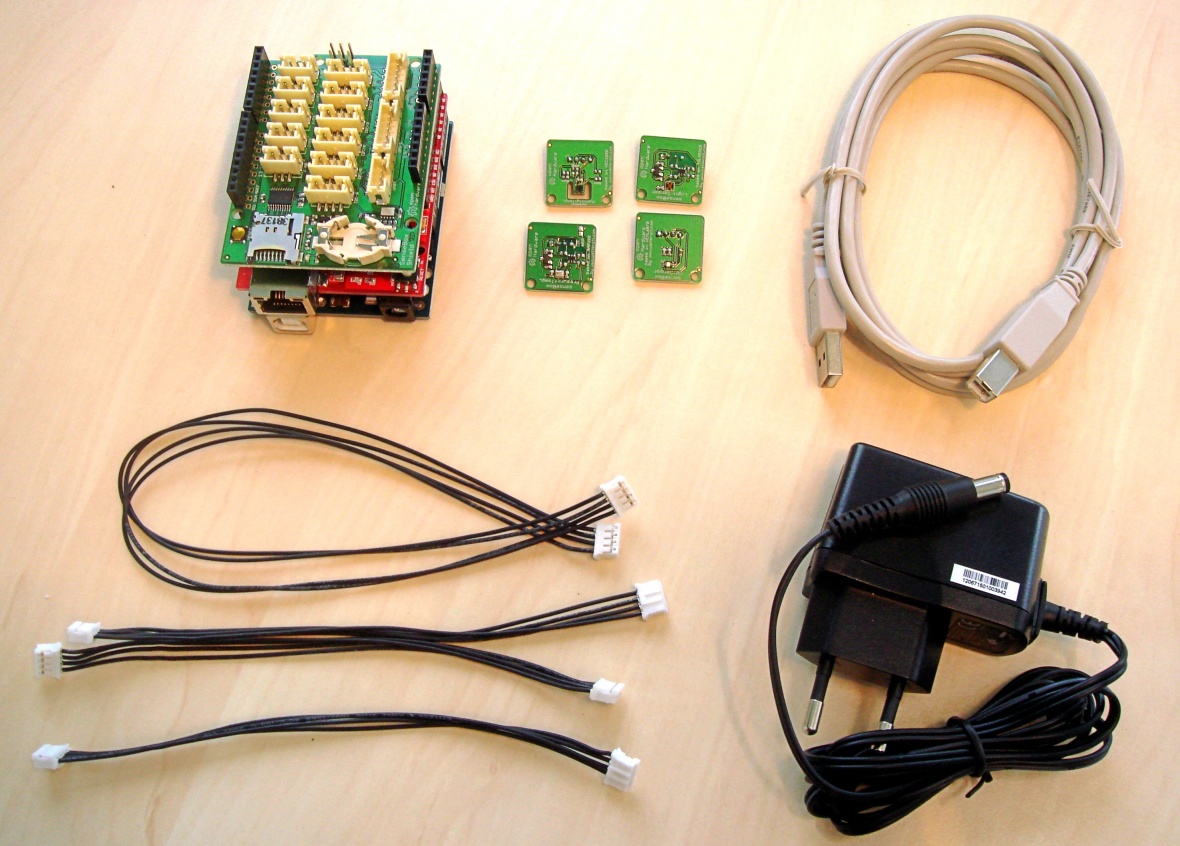
Before starting out, you should check whether your box contains all components. See below for a complete inventory list.
Inventory list
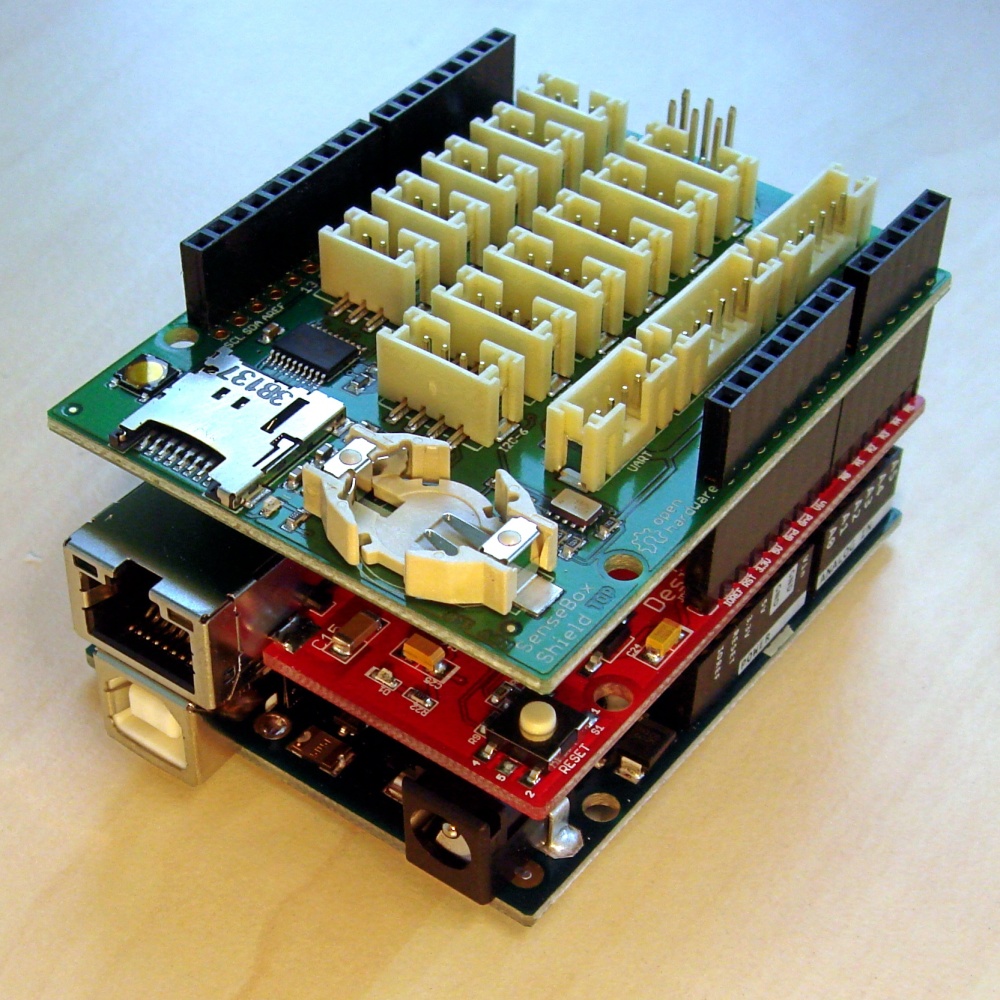
Main board consisting of 3 circuit boards
The senseBox:home is available in two editions: It comes either with an ethernet- or WLAN-shield for the connection to the internet.
The three boards are stacked on top of each other:
- bottom: microcontroller
Wattuino Uno R3, contains the main computing and IO unit. - mid: ethernet shield
W5500or Watterott WiFi-shield, provides the board with an internet connection. - top: custom
senseBox Shield, provides an real time clock (RV-8523-C3 RTC), microSD-slot, and connectors for the sensors.
Basic configuration with 4 sensors
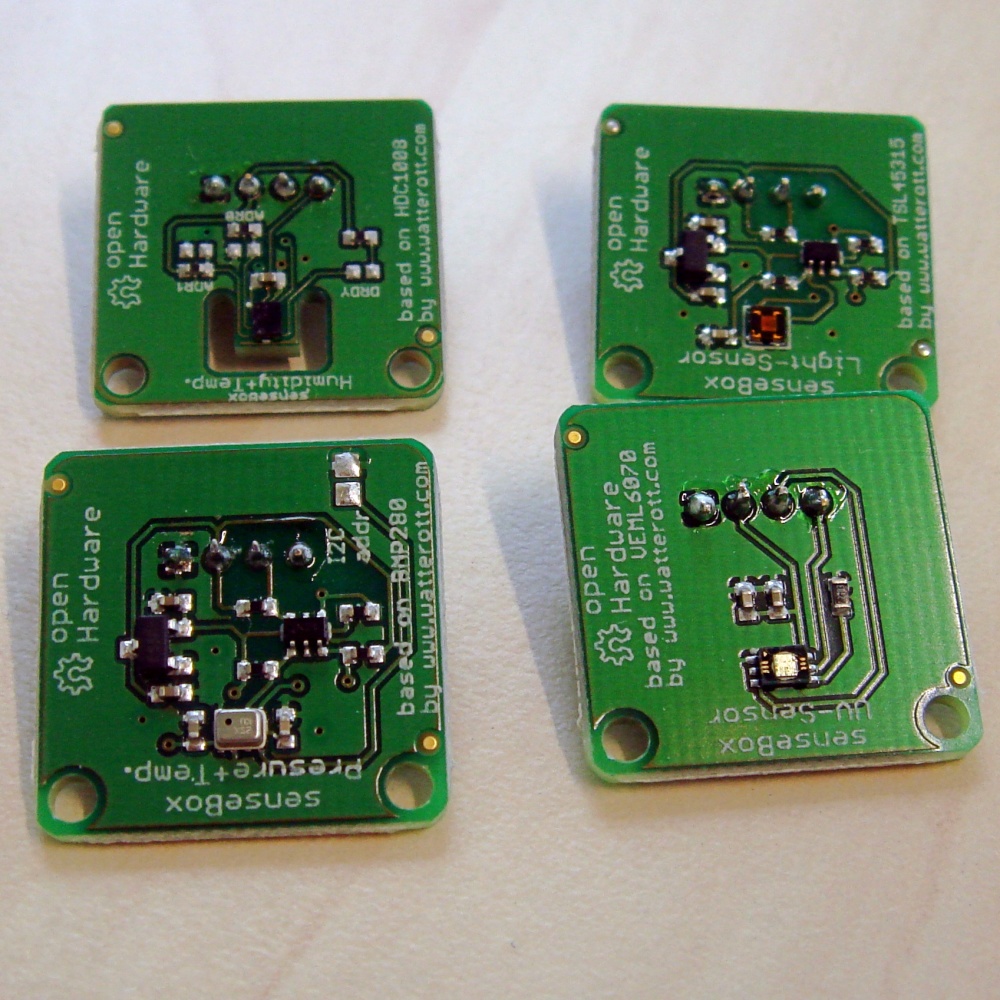
HDC1008-- thermometer and hygrometer, measuring temperature (°C) and relative air humidity (%)BMP280-- barometer, measuring air pressure (hPa)TSL45315-- luxmeter, measuring intensity of the visible light spectrum (Lux)VEML6070-- UV-light sensor, measuring intensity of UV-light radiation (μW/cm²)
Connection cables for sensors & USB
- 1x USB Type B cable: for the connection between the Wattuino and your computer
- 3x short connection cable: for three of the sensors
- 1x long connection cable: for flexible positioning of the
HDC1008
Power supply
- 9V DC (670mA)
Overview
Additional accessories (NOT included with your senseBox:home)
To set up your senseBox outdoors, you need additional components, which are not included with your box.
- ethernet cable, for internet connection to your router (if you have the ethernet edition)
- casing, for a weatherproof outdoor installation of the device
- tools for the assembly (e.g. hot glue, drill, ...)
The casing has to meet some requirements to ensure a minimal impact on the measurements. It has to have...
- a transparent top cover, without a filtering effect (G-UVT plexiglass normally does the job). This ensures proper light measurements.
- a white colored material, so it reflects most of the longwave radiation, allowing proper temperature measurements.
- some holes for proper airflow (while keeping it waterproof).
The material cost for such a case total at around 20 - 30 €. Building instructions are not contained in this tutorial, you may get creative yourself! At the end of this tutorial an exemplary assembly is described.
Assembly of your senseBox
Learn how to assemble your measuring station in few steps.
The senseBox may be powered via USB or the power supply; you only need to connect the power supply after loading the software onto the senseBox.
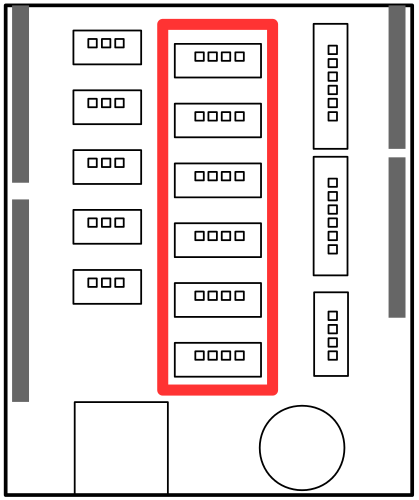
Connect the sensors
You will find four small circuit boards shipped with your senseBox; those are the sensors. The actual sensors are only a few millimeters big, and are placed on the topside of the board. To prevent damage to the board avoid touching the sensitive sensors, but grab the board on its sides.
Connecting the sensors is quite simple: Just use the connection cables to connect the sensors to the board. The order of the sensors does not matter. The longer connection cable is meant for the HDC1008.
Made with ♥ by the senseBox team at ifgi, WWU Münster
All content is published under CC BY-SA 4.0
