Driver- & software installation
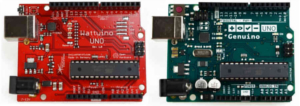
The senseBox:home is available with different microcontrollers: Older versions come with a Wattuino Uno board (pictured on the left), current versions come with a Genuino Uno board (pictured on the right).

only windows users with a Wattuino Uno have to do a manual installation of the FTDI drivers (see below)
Preparation
Before activating your senseBox, installation of drivers and additional software on your computer is required. Also a test run is recommended to verify the proper operation of sensors and internet connection. This setup guide is written for Windows 7, but other operating systems like Linux and OSX are supported as well, and are set up similarly.
If something goes wrong, just contact our support team!
Arduino IDE software download
Please use Arduino IDE v1.8.3 or higher!
The senseBox uses a modified version of the Arduino Uno microcontroller. To load a program onto the board, you need the integrated development environment (IDE) by Arduino. Download the latest version from the Arduino homepage and unpack the downloaded zip-file (see images below).

Arduino is an open source project and is funded through donations. Thus you are asked for a contribution, but you may skip this by clicking "just download".

Create a new folder on your harddrive and unpack the downloaded zip-File there.
To launch the IDE, click on arduino.exe.
Linux users may check this page for installation instructions.
Installation of Arduino libraries
To be able to control the sensors and ethernet-shield, additional libraries are required. As we are using a custom ethernet shield, the default ethernet libary won't work.
You can download all required libraries here.
Download the archive and unpack it in your arduino-folder.
In case of file conflicts, always overwrite the old files.
Driver installation
You can skip the installation of FTDI drivers with the Genuino Uno board, as well as on UNIX based operating systems.
In the last step of the software installation drivers for the microcontroller need to be installed. On Windows 7 and newer the installation should be started automatically, given a working internet connection. Just plug in the microcontroller via USB and wait until the installation is completed (see notification below).

Sensor testing
Next we check, if all sensors operate correctly. To do that
- start the Arduino IDE
- select
Arduino Unoin the topbar menuTools→Board - select the correct device in the topbar menu
Tools→COM-port- In case multiple options are displayed, the correct port may be found in the windows device manager or by trial & error.
Now we load a sensor testing program onto the microcontroller, which we previously downloaded with the senseBox libraries:
- open the sketch: select in the topbar
File→Examples→senseBox→_01_sensor_test - upload the sketch: select in the topbar
Sketch→Upload, or click the arrow icon in the toolbar - open the serial monitor: select in the topbar
Tools→Serial Monitoror click the magnifiyng glass in the toolbar
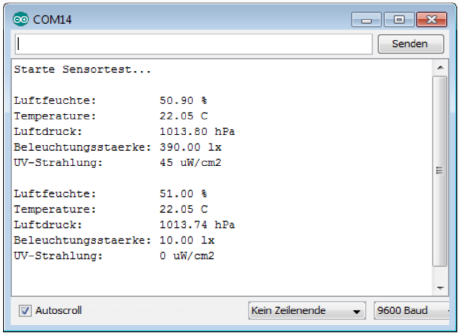
Now the current measurements of the connected sensors should be printed in the serial monitor. You may check the correctness of the temperature-, humidity- and light intensity-values by experimenting. Air pressure and UV energy can hardly be tested directly, but the values should be around 600 - 1000 hPa and below 50 μW/cm² (indoors) respectively.

Test the internet connection
Finally we check the internet connection to the openSenseMap (OSeM) server:
- close the serial monitor window
- connect an ethernet cable from your home network to the sensebox
- you may also connect it to another computer and share it's WiFi as described here
- load the
_02_network_testsketch:File→Examples→senseBox - reopen the serial monitor
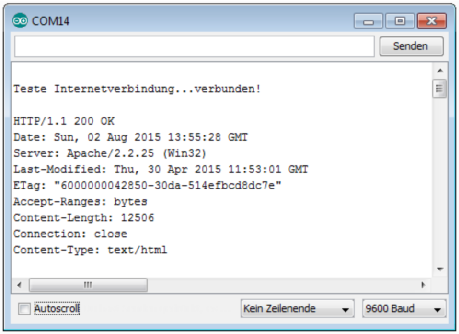
If the connection was successful, an according message is displayed in the serial monitor.

